Mochi ice cream has become one of the most fun and unique desserts to enjoy in recent years. With its soft, chewy rice dough wrapped around creamy ice cream, mochi ice cream offers a texture and flavor experience that’s completely different from a traditional scoop. What many people don’t realize, however, is that you can actually make mochi ice cream at home with just a few simple ingredients and a little patience.
If you’ve ever wanted to recreate this popular dessert in your own kitchen, this guide will walk you through everything you need to know. From understanding what mochi is to learning the step-by-step process for wrapping ice cream in soft rice dough, you’ll be ready to impress friends, family, or simply treat yourself to a homemade batch.
What Is Mochi Ice Cream?
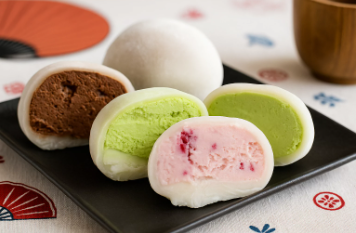
Mochi ice cream is a Japanese-inspired dessert that combines two delicious elements: sweet rice dough and ice cream. The outer layer, called mochi, is made from glutinous rice flour, sugar, and water. When cooked, this mixture forms a stretchy, chewy dough that can be wrapped around small balls of ice cream.
The result is a bite-sized dessert that is soft on the outside and cold and creamy on the inside. Because the dough acts as a wrapper, mochi ice cream is easy to hold and eat without needing a bowl or spoon. This portability has made it incredibly popular in dessert shops and grocery stores around the world.
One of the best things about making mochi ice cream at home is that you can customize the flavors however you like. Whether you prefer classic vanilla, fruity strawberry, or bold matcha green tea, the possibilities are endless.

Don’t forget to share what you create on Facebook and Instagram tag us @creameryblog or use #creameryblogrecipe
Ingredients You’ll Need

Before getting started, gather the following ingredients:
For the ice cream centers:
- 1 pint of your favorite ice cream (vanilla, chocolate, strawberry, or matcha work great)
For the mochi dough:
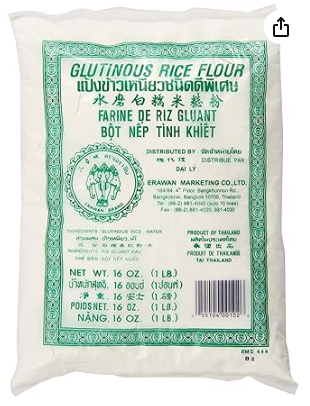
- 1 cup glutinous rice flour (also called sweet rice flour)
- ¼ cup granulated sugar
- ¾ cup water
- Cornstarch or potato starch (for dusting)
These ingredients are easy to find at most grocery stores or Asian markets. Glutinous rice flour is the key ingredient that gives mochi its signature chewy texture.
Step 1: Prepare the Ice Cream Scoops
The first step is to create the ice cream centers that will go inside your mochi.
Using a small ice cream scoop or spoon, scoop out round balls of ice cream and place them on a baking sheet lined with parchment paper. Aim for about 1–2 inch balls so they’re small enough to wrap easily.
Once all the scoops are placed on the tray, put the tray in the freezer for at least 1–2 hours. The ice cream needs to be very firm so it doesn’t melt while you’re wrapping it later.
Freezing the scoops ahead of time is one of the most important steps in making successful mochi ice cream.
Step 2: Make the Mochi Dough
While your ice cream scoops are freezing, you can prepare the mochi dough.
In a microwave-safe bowl, mix together the glutinous rice flour and sugar. Slowly add the water while stirring until the mixture becomes smooth and lump-free.
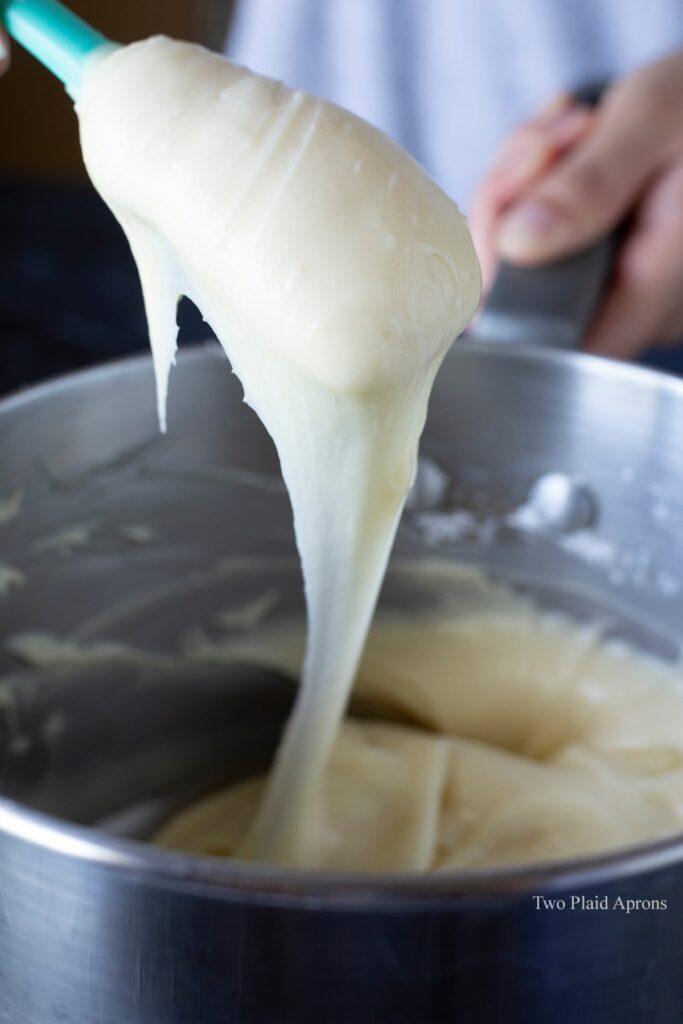
Cover the bowl loosely with plastic wrap and microwave the mixture for 1 minute. Remove it, stir it well, then microwave again for another 1 minute. Stir again and microwave for a final 30 seconds to 1 minute.
After the final heating, the dough should appear thick, sticky, and slightly translucent. This texture means the rice flour has cooked properly and formed the stretchy consistency that mochi is known for.
Be careful when handling the dough because it will be hot at this stage.
Step 3: Roll Out the Mochi
Next, you’ll prepare the dough so it can wrap around the ice cream.
Dust a clean surface generously with cornstarch or potato starch. This prevents the sticky mochi dough from sticking to the counter or rolling pin.
Place the hot mochi dough onto the surface and dust the top with more starch. Using a rolling pin, roll the dough out until it is about ¼ inch thick.
Once rolled out, transfer the dough onto a baking sheet and place it in the refrigerator for about 20–30 minutes. Cooling the dough makes it easier to cut and handle.
After it has chilled, use a round cookie cutter or glass to cut circles of dough that are large enough to wrap around your frozen ice cream balls.
Step 4: Wrap the Ice Cream
Now comes the fun part assembling your mochi ice cream.
Remove a few ice cream balls from the freezer at a time so they stay frozen while you work.
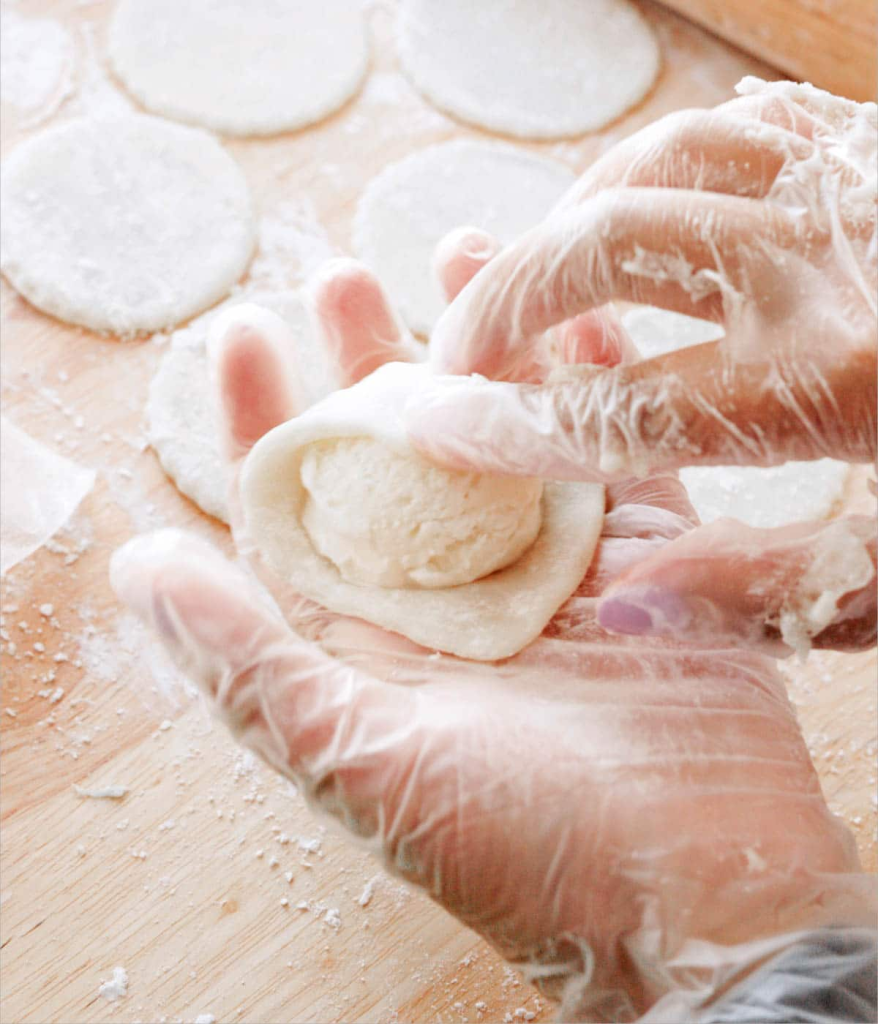
Place one frozen scoop in the center of a mochi circle (tip dust the circle lightly with flour to keep from sticking to hands. Carefully pull the edges of the dough up around the ice cream, gently stretching it if needed.
Pinch the dough together at the top to seal the ice cream inside. If there’s excess dough, you can trim it off to keep the mochi bite-sized.
Once wrapped, place the mochi ice cream seam-side down on a tray lined with parchment paper.
Work quickly during this step to prevent the ice cream from melting.
Step 5: Freeze the Mochi Ice Cream
After wrapping all the ice cream balls, place the tray back into the freezer for at least 2 hours.
This final freezing step allows the mochi to firm up slightly and helps the ice cream maintain its shape. Once frozen, your homemade mochi ice cream is ready to enjoy.
For best results, store mochi ice cream in an airtight container in the freezer.
We would love to hear from you! Let us know below how this recipe works for you!
Flavor Ideas to Try
One of the biggest advantages of making mochi ice cream at home is the ability to experiment with different flavors.
Here are a few delicious combinations you might want to try:
Classic Vanilla – A simple, creamy option that pairs perfectly with the chewy mochi exterior.
Strawberry Mochi Ice Cream – Bright, fruity, and refreshing—great for summer.
Matcha Green Tea – A slightly earthy flavor that is very popular in Japanese desserts.
Cookies and Cream – Crunchy cookie pieces inside creamy ice cream create a fun texture contrast.
Mango or Tropical Flavors – A classic you always have to try.
These flavors add a refreshing twist and vibrant color.
Mixing and matching flavors can turn your homemade mochi ice cream into a creative dessert experience.
Tips for Success
Making mochi ice cream can take a little practice, but these tips will help you get the best results:
- Keep everything cold.
- If the ice cream starts melting, put it back in the freezer before continuing.
- Use plenty of starch.
- Mochi dough is very sticky, so dusting your work surface generously is essential.
- Work in small batches.
- Only take a few ice cream scoops out of the freezer at a time to keep them firm.
- Don’t make the dough too thick.
- Thin dough wraps better and gives the classic mochi texture.
With a little patience, your technique will improve and the process will become easier each time.
Why Homemade Mochi Ice Cream Is Worth It
Store-bought mochi ice cream is convenient, but making it yourself allows you to control the flavors, quality, and creativity behind each piece. Homemade versions also let you experiment with unique ice cream combinations that you might not find in stores.
It’s also a surprisingly fun activity to do with friends or family. Rolling the dough, wrapping the ice cream, and tasting the final product can turn dessert-making into a memorable experience.
Plus, there’s something incredibly satisfying about biting into a soft mochi shell and discovering the cold, creamy ice cream inside—especially when you made it yourself.
Final Scoop
Mochi ice cream might seem like a complicated dessert, but with the right ingredients and a little preparation, it’s completely achievable at home. By freezing small scoops of ice cream, making a simple rice dough, and carefully wrapping each piece, you can recreate this beloved treat in your own kitchen.
Whether you’re trying it for the first time or experimenting with new flavors, homemade mochi ice cream is a fun and rewarding dessert to make. Give it a try, get creative with your flavor choices, and enjoy every chewy, creamy bite.